简易刷铁机的制作
原料:
任意方框: 泥土、玻璃、石头均可以
收集装置
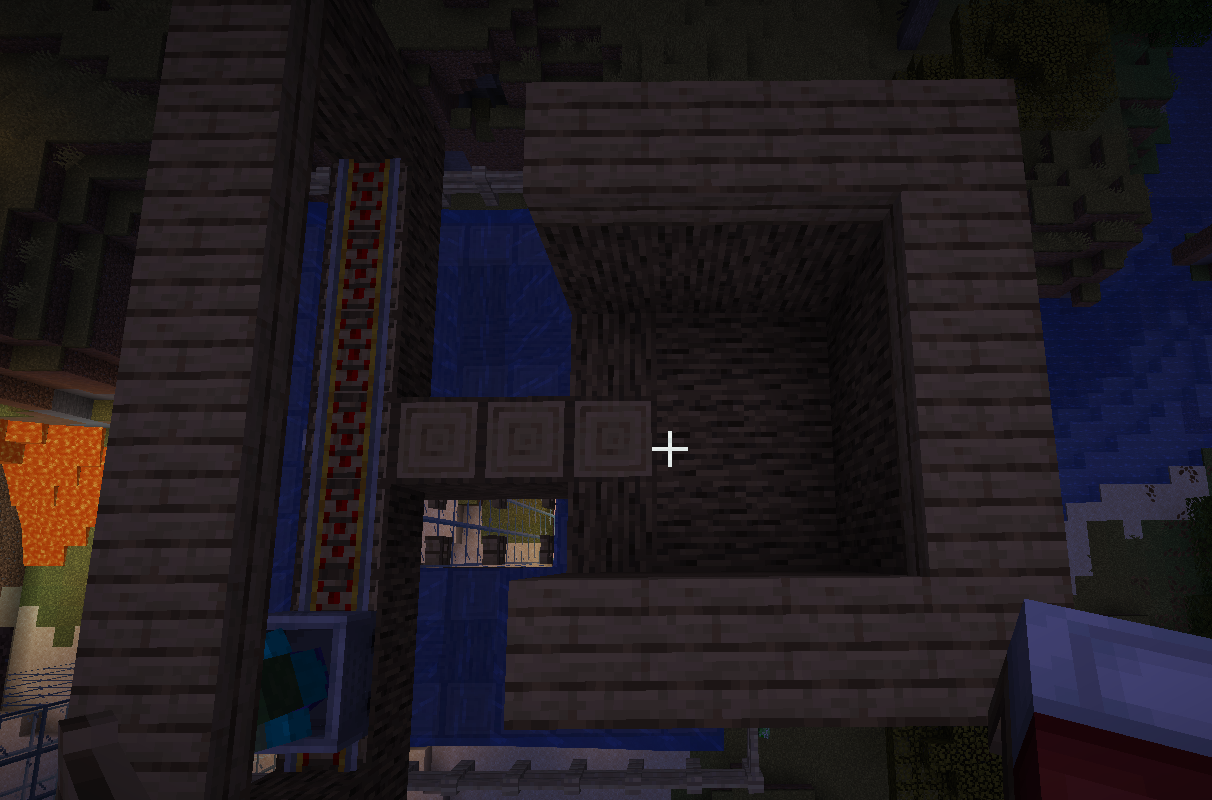
首先搭建下面的装置,一格深的装置,两个小箱子组成的大箱子----箱子*2 方块*15
接下来放置9个漏斗,漏斗连接到箱子上,方法是shift+右键点击对应方块,即可将漏斗连接到方块上、将红色线圈内的漏斗连接到箱子,其余漏斗依次连接
检验是否安装成果: 向漏斗里面丢东西,最后可以在箱子里面找到

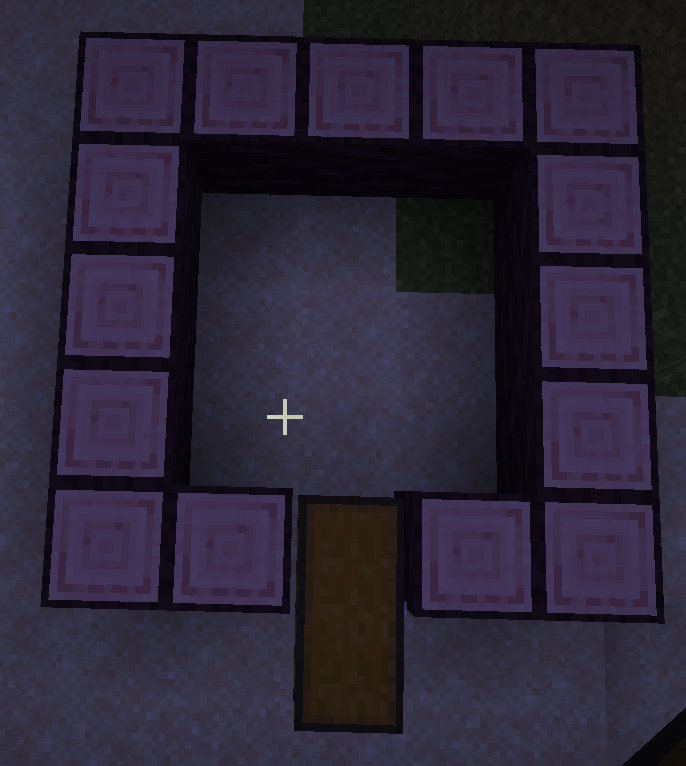
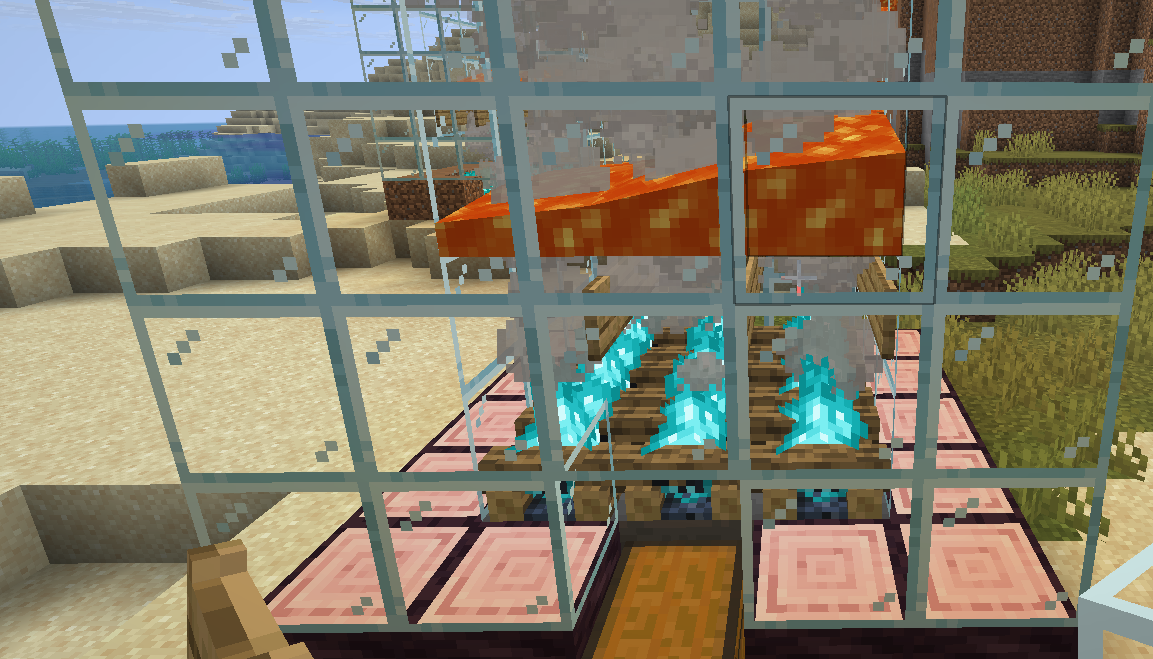
铁傀儡处死装置
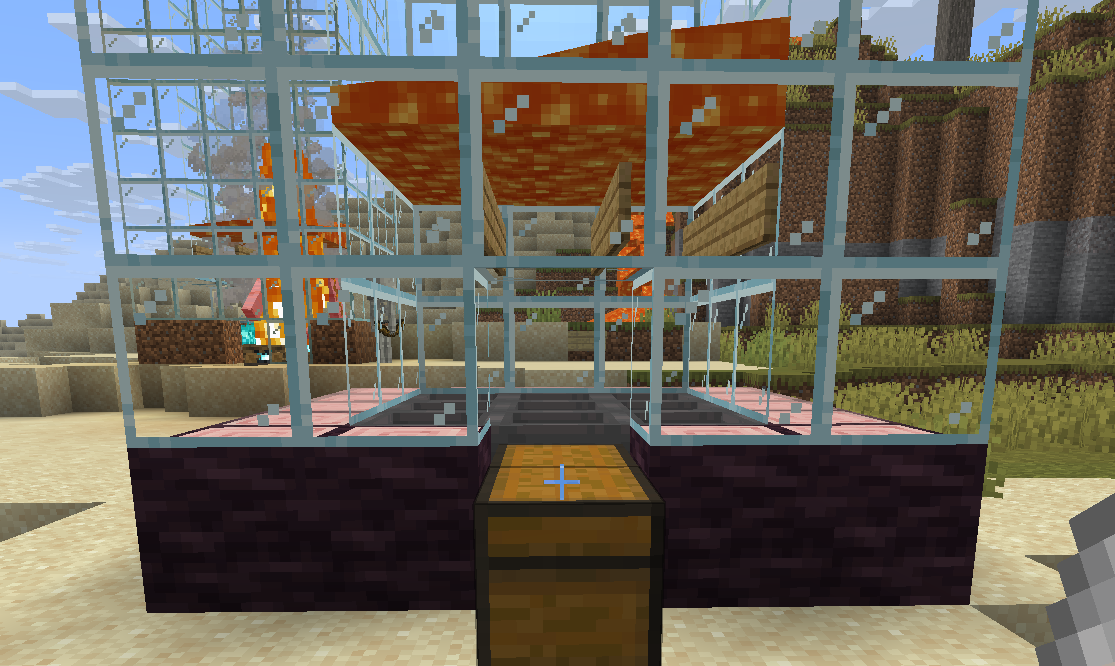
在收集装置基础上向上搭建20格,并形成通道,部分区域可简化,以节省方块,当然也可以想底下挖,将收集装置位于-20处以节省方块,需要方块16*20=320,告示牌*9
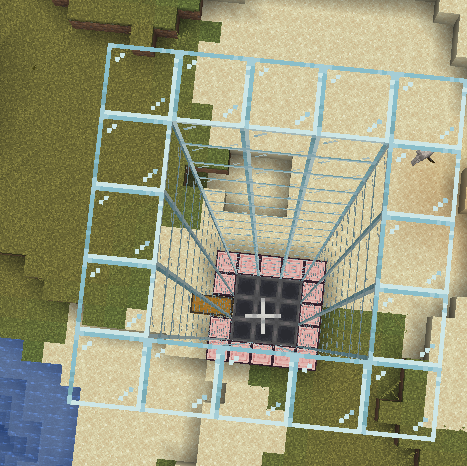
在距收集装置2格处放置告示牌,悬浮告示牌放置需要将光标指向告示牌右侧 shift+右键单机(下面的截图均高了一格)
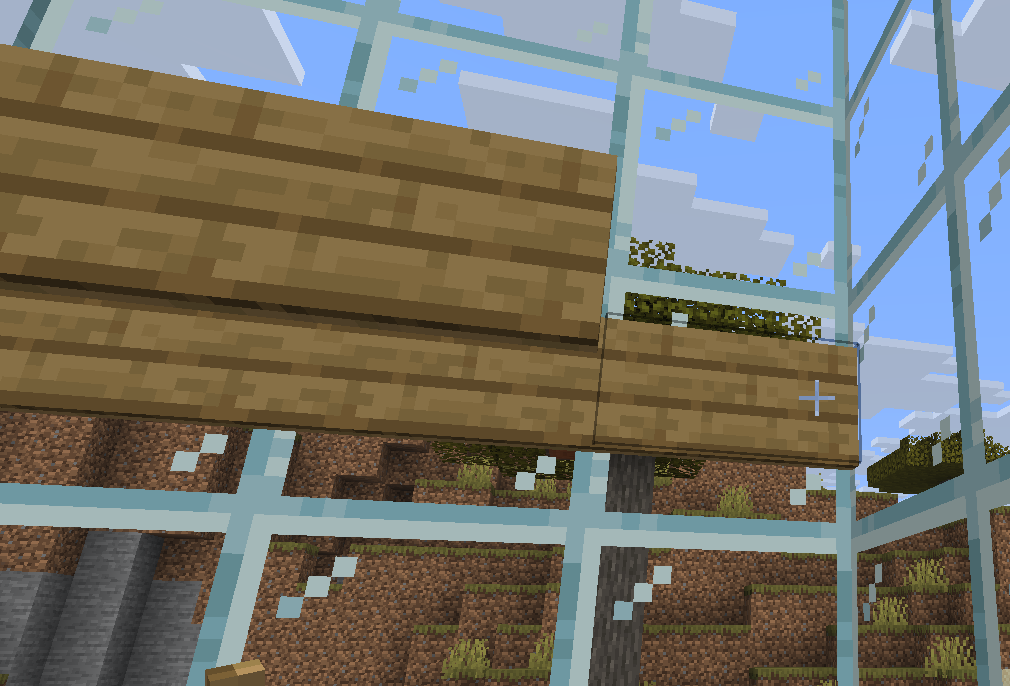
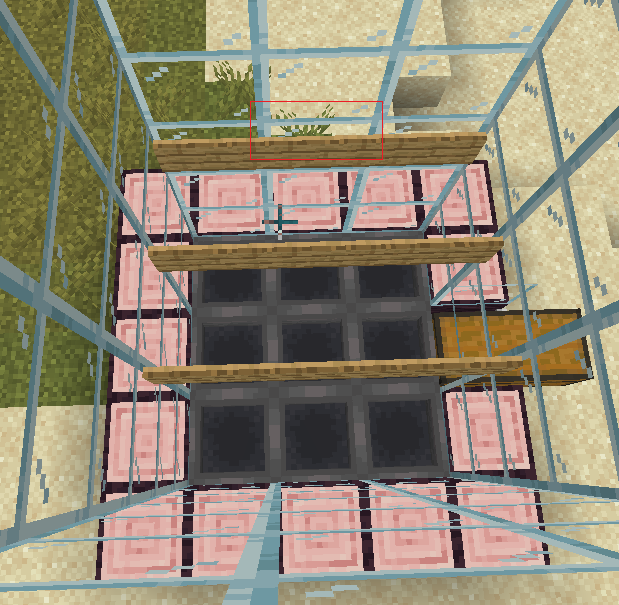
在告示牌安置上一个放置岩浆,上图红框范围
铁傀儡生成
搭建铁傀儡生成后的移动平台,利用水流将铁傀儡推到处死装置里
搭建9*9的方格,并在方格外侧添加围栏,挡住水的流动
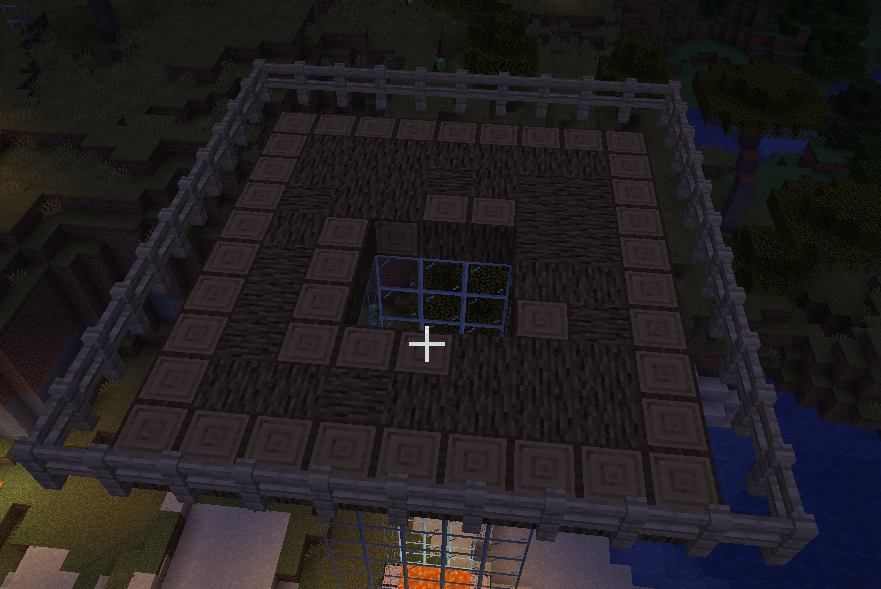
先在中心添加栅栏门,挡住水流向下的移动,在四个角的方块上放置水源,将铁傀儡向中心推动

在僵尸过道两侧建立有3*3*2空间的空间的村民房
放入床并封顶,注意床要顶格放,否则僵尸吓不到村民,如果夜晚村民睡觉了,说明距离太远了,以及注意床的方向,床的方向不对,村民不会睡觉
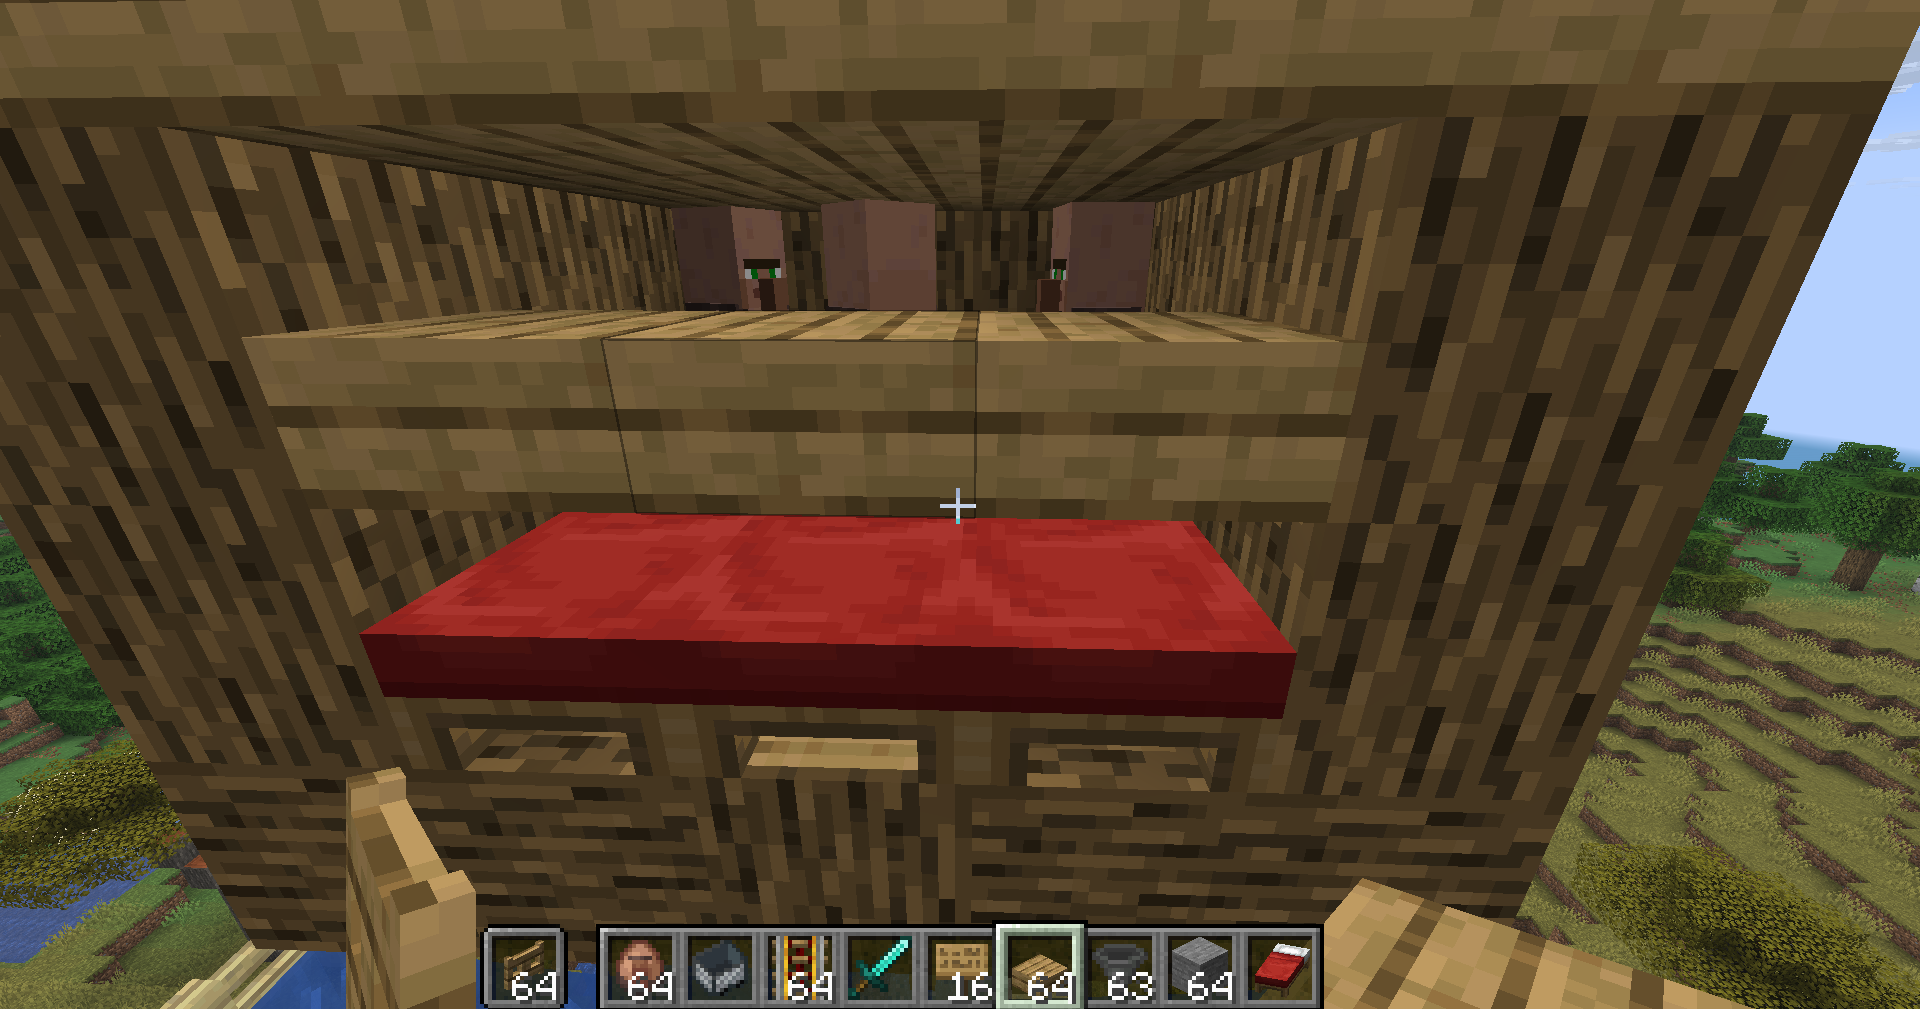
在最底下可以放置灵魂篝火,以加快效率
注意: